Table of contents
- Basic information
- Installation
- Configuration
- DS18B20 temperature sensor installation
- Data exchange / MQTT
- openHAB configuration
- Information about new versions and problems reporting
Configuration
Sonoff switch configuration can be made through the web browser. There are two ways how to start Sonoff configuration:
- set Sonoff to Access Point mode and connect to it from a computer or a smartphone via Sonoff WiFi network
- set Sonoff to configuration mode and connect to it via browser by entering Sonoff IP address
First method is used during first launch of Sonoff or when Sonoff has got problems connecting to configured earlier home / office WiFi network. The second method is available only when Sonoff has been already configured and is connected to home/office WiFi network.
First launch of the switch
During first launch of Sonoff switch, it goes automatically to configuration mode. Build-in LED blinks fast. In your computer or smartphone:
- open WiFI manager and look for WiFi network called with SONOFF_ prefix.
- connect to this network – there is no password
- while you are connected to it enter http://192.168.5.1 in your web browser.
- after few seconds configuration panel should open
Configuration after first launch
If you configured Sonoff earlier and you wanted to perform further configuration changes you can choose one of two possible methods to open configuration panel
- set Sonoff to Access Point mode and connect to it from a computer or a smartphone via Sonoff WiFi network, like in the description above or
- set Sonoff into configuration mode without the need to establish Access Point by Sonoff switch
Second method does not require you to connect to Sonoff by connecting to SONOFF_ …. WiFi network but you have possibility to open Sonoff Configuration panel by entering Sonoff IP address assigned to it by your WiFi router, in your web browser.
Setting Sonoff switch to configuration mode with Access Point
- press build-in button and hold it until Sonoff LED turns on
- Sonoff is in the configuration mode with Access Point – follow description “First start of a switch”
Setting Sonoff switch to configuration mode without Access Point
- press build-in button and hold it for 3 to 6 seconds
- after 3-6 second release button. LED in the Sonoff should turn on and blink fast after few seconds
- in the web browser enter assigned to Sonoff switch IP address – you can find it in your WiFi router
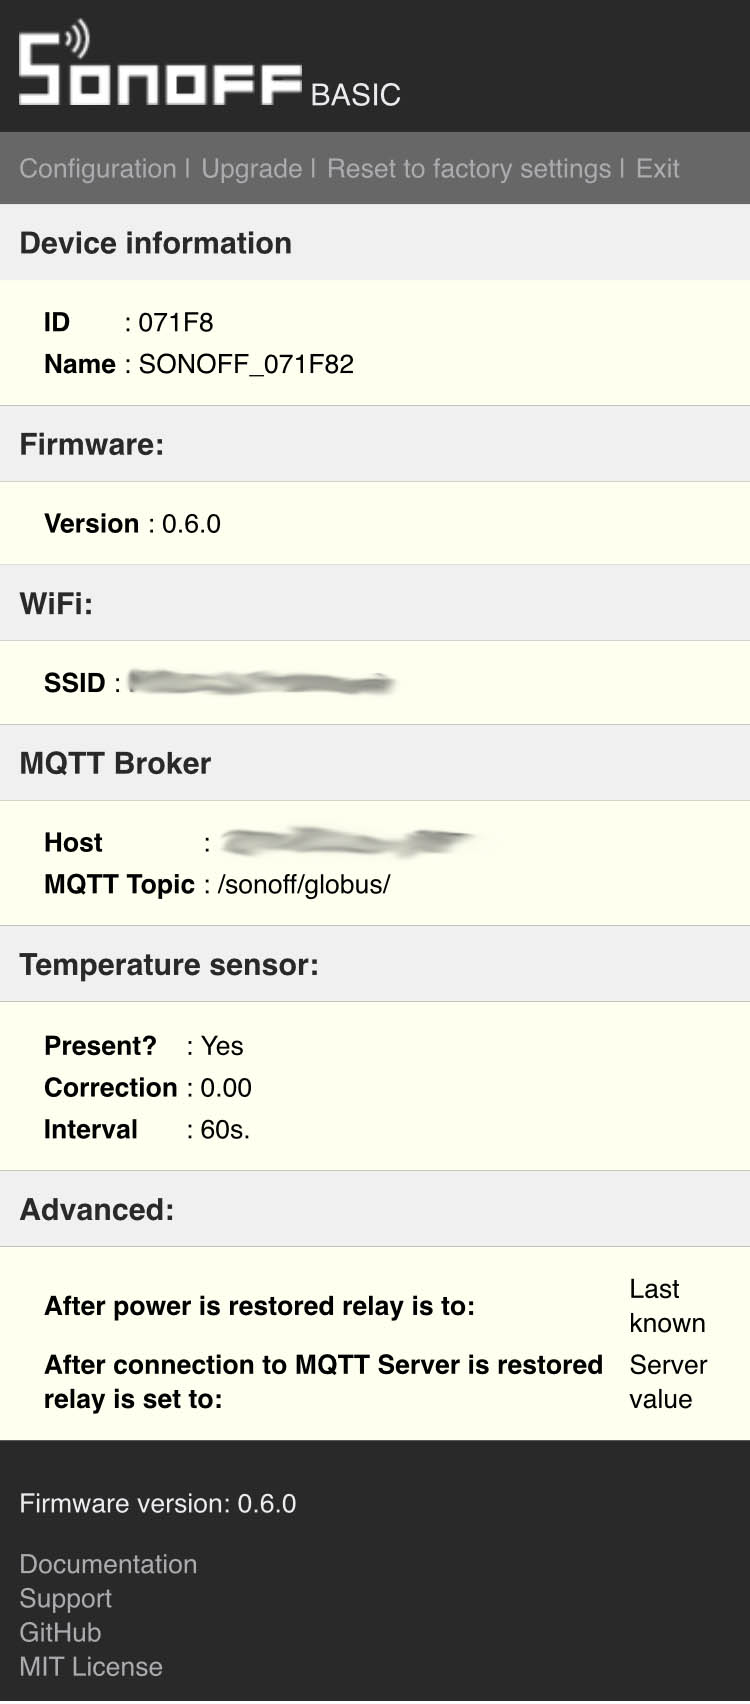
Configuration Panel
Configuration panel contains couple of screens.
In the header there are links which navigates to configuration options:
- Configuration: opens form where you can configure your switch
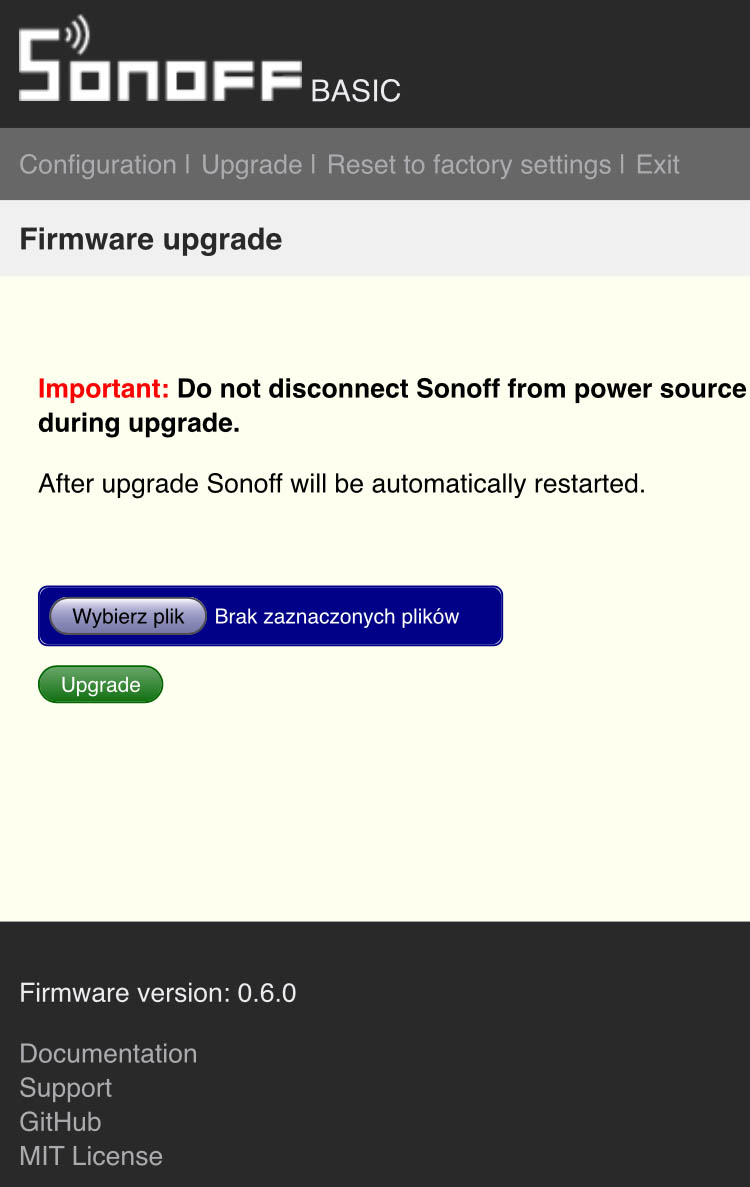
- Upgrade: allows to update firmware when there was newer version of firmware available
- Reset to factory settings: by pressing it Sonoff configuration will be removed to firmware defaults settings. Switch goes to Access Point configuration mode. You will lose connection to it if you were not in the configuration with Access Point mode.
- Exit: by pressing it switch exits from the configuration mode to switch mode. All changes (if made) are applied.
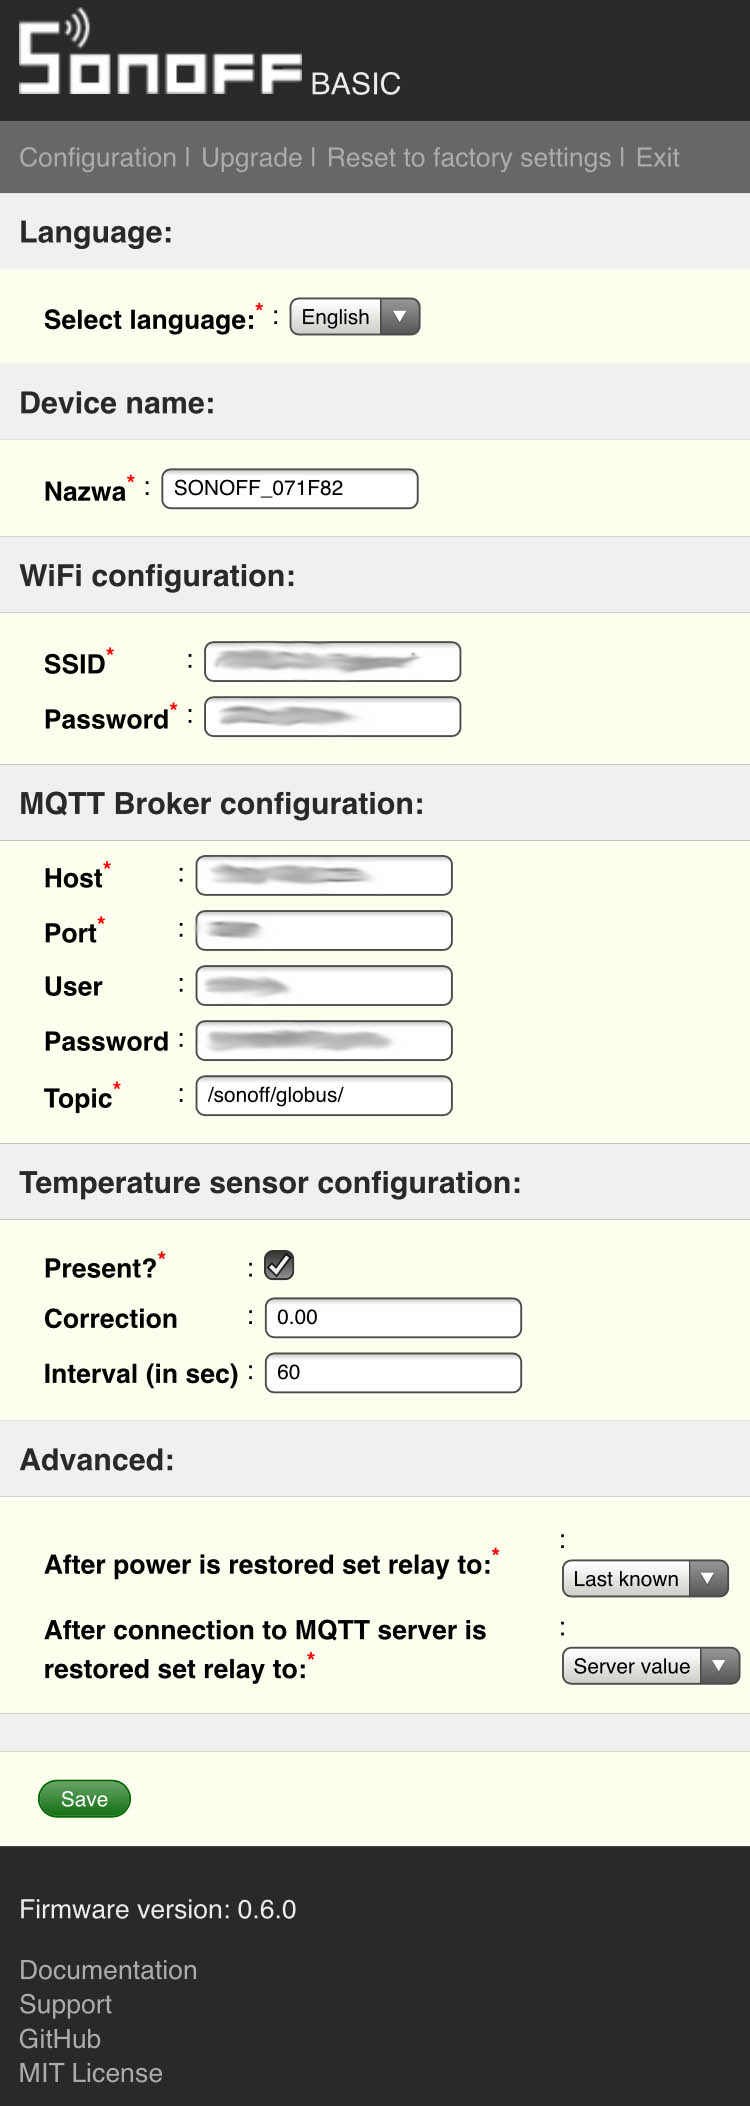
Additional information:
- If you change Device name, it will also change a host name identifier in local network and WiFI SSID which is used to connect to Sonoff configuration panel in Access Point mode.
- for now, all information including passwords are not hidden and are fully visible
- double check what you enter. Entering wrong WiFi parameters will cause that Sonoff will not connect to your WiFi network, you will also lose possibility to configure it without Access Point configuration mode.
- Fields WiFi SSID, MQTT Broker, Topic, User, all passwords can be max 32 chars size.
- MQTT Port can be from 0 to 99999 range.
> Go to manual how to install DS18B20 temperature sensor